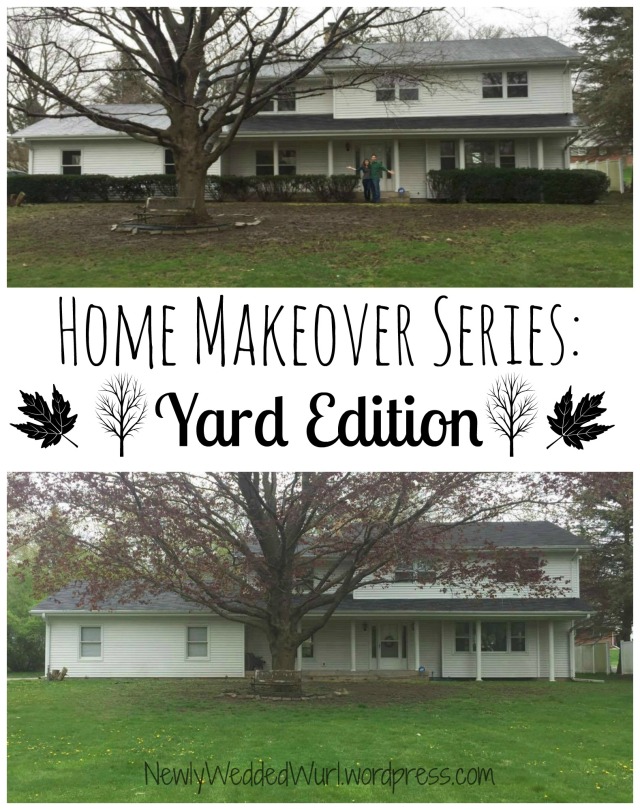
Home Makeover Series: Yard Edition

Hey everyone and happy start of summer! It certainly has felt like summer the past two weeks. One thing I have noticed so far this month is that our new city (two hours south of where we used to be) gets SOOO HOT. It has been accepted as normal if the temperature reaches above 90 every day this week. The random rain showers, followed by immense heat, has made me very thankful that, for the most part, we have already tackled our big yard projects already since moving in! Which leads me to today’s blog post topic;

Home Makeover Series: Yard Edition | NewlyWeddedWurl.wordpress.com

As I said in my last [post], the yard was pretty overgrown and unkempt when we bought the house. I mean, the fence looked like this;

Fence Before | Home Makeover Series: Yard Edition | NewlyWeddedWurl.wordpress.com

The house wasn’t visible from the road, since our row of “bushes” -which actually turned out to be trees- had grown about four feet in diameter.

Front Yard Before | Home Makeover Series: Yard Edition | NewlyWeddedWurl.wordpress.com

We had super dated bushes hiding surrounding the front and side of the house, and once the trees filled out for the spring/summer, it was nearly impossible to mow under them, as most branches practically touched the ground.

Our New House | Once Upon a Time, We Moved | NewlyWeddedWurl.wordpress.com

Before we had even closed on the house, we went over to the property to pick up fallen limbs and sticks which had been left on the ground for who knows how long. Imagine our amazement when we had a 4ft high, 8ft long, 4ft wide pile of debris after our labors– before we even cut a bush or limb! Since our new city charges a crazy amount for leaf and stick pick up, we went with our next best option to get rid of our renovation mess and yard cleanup.

Our Yard Waste Life Saver | Home Makeover Series: Yard Edition | NewlyWeddedWurl.wordpress.comYep. We actually have over-filled TWO of these big fellas so far in our reno!

Yard Waste! | Home Makeover Series: Yard Edition | NewlyWeddedWurl.wordpress.com
This is actually our second round of debris- and our second dumpster!

If we weren’t working on the inside of the house, we were sweating outside trying to make our property look lived-in. My husband did an amazing job tearing out those bushes that hid our house while I did the first round of limb cutting.

Tree Limb Removal #1 | Making Progress on Bush Removal! | Home Makeover Series: Yard Edition | NewlyWeddedWurl.wordpress.com  Bush Removal  | Home Makeover Series: Yard Edition | NewlyWeddedWurl.wordpress.com Before and After the Bush Removal | Home Makeover Series: Yard Edition | NewlyWeddedWurl.wordpress.comMaking Progress on Bush Removal! | Home Makeover Series: Yard Edition | NewlyWeddedWurl.wordpress.com

Here is what the house looked like after all that hard work:

House After Removing Bushes |  Home Makeover Series: Yard Edition | NewlyWeddedWurl.wordpress.com

MUCH better, if you ask me! Another huge improvement was cutting back and starting to tear out some of those trees in the front of our yard:

Before and After Tree Trimming | Home Makeover Series: Yard Edition | NewlyWeddedWurl.wordpress.com

What do ya know? We actually can see the road now, and people can see that this house is not actually abandoned. We have big plans for this area, including tearing out more trees, adding mulch, and planting flowers up here, but we are taking baby steps :).

Another improvement to the front of our yard was our mailbox.

Mailbox Before and After | Home Makeover Series Yard Edition | NewlyWeddedWurl.wordpress.com

We still have a lot of work to do in order for our yard to look pretty and “host a  party” worthy, but I am so proud of the work we have finished so far! Hopefully in the next few weeks I can show our pack patio all finished and ready to host our family or our neighbors for a little backyard picnic. Until then, here is a sneak peak at how the front porch is coming along. I still need to get a mat, some flowers, and update my wreath for the summer, but I love my Dollar Tree red, white, and blue ribbons!

Forth of July Decor | Home Makeover Series: Yard Edition | NewlyWeddedWurl.wordpress.com

Thanks for reading today! I would love to hear from you! What do you love or hate about yard work and outdoor projects? What have you been working on?

Once Upon a Time, We Moved…

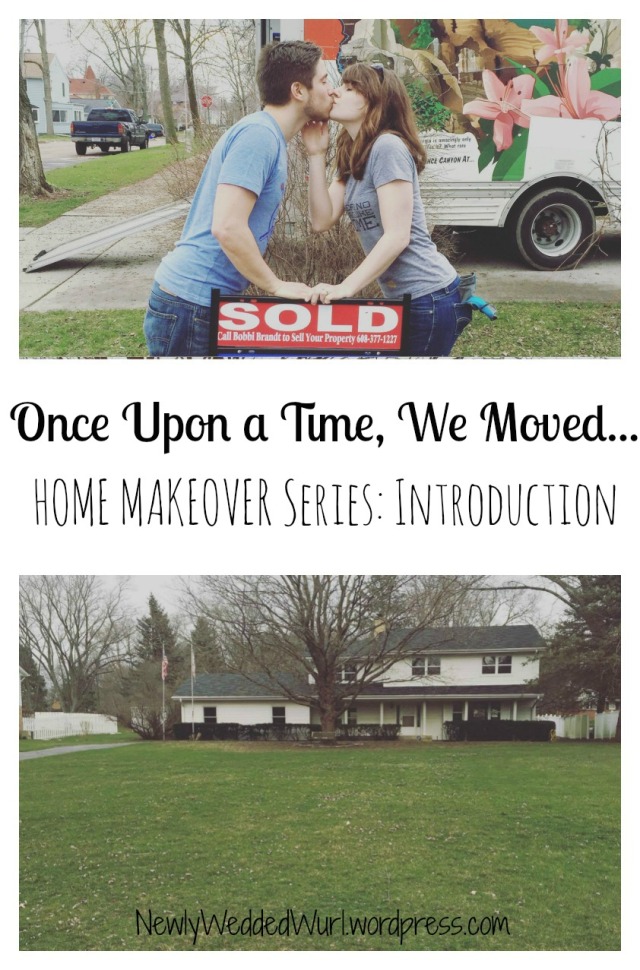
April 8th was the day we closed on our new house (we closed on our old house the week before, but that’s a whole other story). Since then we have been renovating the property from mailbox to master bathroom; and its about time I start a series to share the results! To start my Home Makeover Series, let me back up and give some details about the move and start showing you around the new house 🙂

Once Upon a Time, We Moved  NewlyWeddedWurl.Wordpress.com

But first, let’s take a quick look back at what our first house looked like:

Our First Home- Moving Through Change Our First Home | Once Upon a Time, We Moved | NewlyWeddedWurl.Wordpress.com Kitchen | Moving Through Change | Newlyweddedwurl.wordpress.com Our First House Tour | Once Upon a Time, We Moved | NewlyweddedWurl.Wordpress.com

In October of last year, we bought this house; we renovated both bathrooms (installing a much needed tub), added a washer and dryer, and cleaned up the landscape. By the start of February, we were fairly certain we would be moving to accompany an amazing job opportunity my husband had. You can see the pictures I used to list the house here. On February 16, we listed our first house with a little fear about the need to sell and a good dose of faith that if God had so clearly directed our path, he would provide for us. One week, four showings, and four offers later, we sold our home above asking price- and made a decent amount of money off of this home we hated to leave. Later that same week, we placed on offer on my dream home.

First Look at Our Dream House | Once Upon a Time, We Moved | NewlyWeddedWurl.Wordpress.com

Seriously. We spent one day in what was to become our new city and looked at 11 houses with a realtor. ELEVEN. Do you know how hard it is to keep all the details straight when you look at 11 houses in one day? Well, I wasn’t very impressed until we looked at house number 9. I immediately fell in love.

Long View of the House | Once Upon a Time, We Moved | NewlyWeddedWurl.Wordpress.com

With an acre of land, a long driveway, a quiet private neighborhood away from the city, and a long front porch with columns- I was in awe before we even went inside.

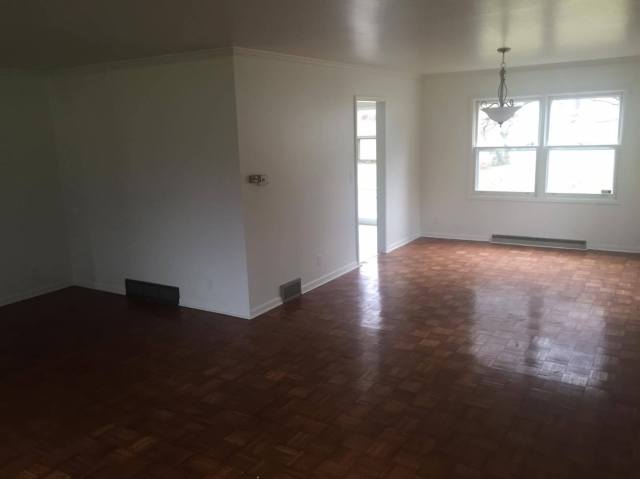
Four bedrooms. Two and a half baths. A family room- with a fireplace- living room, AND dining room. Two car garage, basement, and backyard patio. All hardwood flooring upstairs. Natural light. I am pretty sure my face looked like the heart eye emoji.

Kitchen Before | Once Upon a Time, We Moved | NewlyWeddedWurl.Wordpress.comNew Family Room | Once Upon a Time, We Moved |NewWeddedWurl.wordpress.com

Then I was angry. Nothing was going to compare to this place! Why did the realtor show us something outside our budget? I fell in love with the house before I felt the reality of the price.

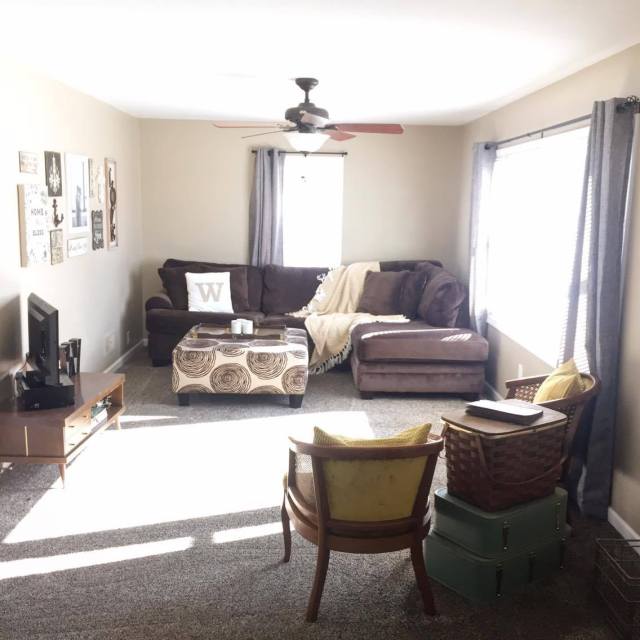
Living/Dining Room Before | Once Upon a Time, We Moved | NewlyWeddedWurl.Wordpress.com

We prayed about it. We looked at the numbers. We praised God that we had sold our house so quickly and that my husband’s new company would pay for us to live in an apartment for the first three months, until we found a place to live. We crunched, calculated, and carefully thought about every possibility of where money could go. We made a budget that included a hefty chunk of change for renovations on my dream home.

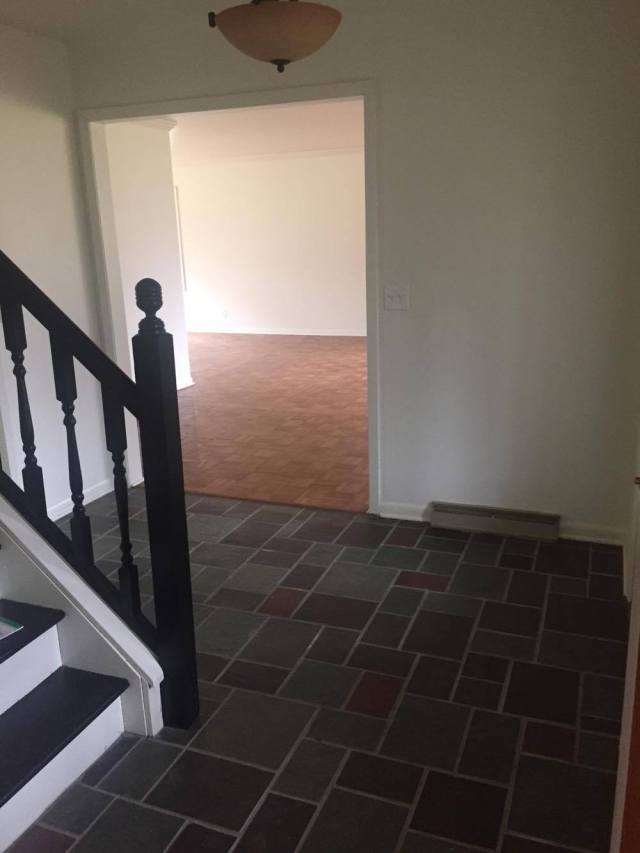
Entryway Before | Once Upon a Time, We Moved | NewlyWeddedWurl.wordpress.com

And you know what? We could make it work.

Honestly, this house I fell in love with was priced well under market value. We found out that a bachelor had lived there for 25 years, got married at the age of 50, and moved out of town after listing his home for sale. The house needed a HUGE cleaning. The yard was overgrown. There was a pile of junk in the driveway that needed to be hauled away. It was going to take some elbow grease and buckets of bleach and vinegar. And paint. And new plumbing. And a washer and dryer. And a dumpster (or two) to throw everything away in. But we could buy this house and make it our own to raise kids, have family gatherings, and grow old together in.
Our New House | Once Upon a Time, We Moved | NewlyWeddedWurl.wordpress.com

We made an offer. We counter-offered. He accepted. And after months of bank communication problems, delays, more problems, frustrations, and a whole lotta patience, we moved in.

Saying goodbye to our first home and welcoming the new house with open arms!

I cannot wait to take you room by room and show you what this place looks like today! It’s been a labor of love between my husband and me (and my mom- thanks mom for helping me paint for days!). This house that I fell in love with is now looking like a home we have made with love.

It has been two months since we moved all our stuff into the garage, started demoing the bathroom, and paint the entire downstairs, and you know what? We still have many months to go. I don’t quite have all my boxes unpacked (fear of actually committing to hang things on the wall has left all my wall pretties in boxes lol). But we are so loving this process of changing every inch of our house into a home we can  at least live in for more than four months lol  grow old together in.

Stay tuned for the next post in this Home Makeover series!

I would love to hear from you! Have you moved into a new place recently? How have you transformed the space into a home? What have been some challenges or blessings you have encountered? Thank you for reading today!


Our Bathroom Makeover [Part 1]

Our Bathroom Makeover [Part 1] | NewlyWeddedWurl.Wordpress.com

When we first looked at our house, we fell in love. It all made sense why no other house we looked out was “perfect”. This house was meant to be ours.

Rose colored glasses were on and we were very happy.

Well, after sharing pictures with family, we were asked/told; “There’s no bathtub?”

Bathroom Before | Our Bathroom Makeover [Part 1] | NewlyWeddedWurl.Wordpress.com

Oh. We didn’t notice that.

There is only one full bath in the house (well, one bathroom in the house; I don’t think you can count the toilet under the basement stairs as a “bathroom”) and it was outfitted with a gigantic walk in shower… with not so pretty tiles, but hey, we could live with it! To satisfy family, we acknowledged that we would have a tub put in at some point (we do want to have a family and raising kids would be easier with a tub).

Prepping for Demo | Our Bathroom Makeover [Part 1] | NewlyWeddedWurl.Wordpress.com

But then the shower had a huge leak into the basement and though we patched the problem, we knew we would have to tear it all out anyway, so hey, might as well just put a tub in now! So with a kind gentleman from our church willing to fit us in his schedule and install the tub, my hubby and I went about the planning, shopping, and purchasing of our supplies. And this week we tackled the demolition.

Starting the Demo | Our Bathroom Makeover [Part 1] | NewlyWeddedWurl.Wordpress.com

The downside to this is the lack of a window in the bathroom (something else family noticed before we did); so all the drywall and tile dust just sort of floated in the air (and into our hair, nostrils, and lungs). But once my husband started knocking out tiles and tearing down walls, we gained motivation to work through the less than pleasant breathing conditions.

My Contributions | Our Bathroom Makeover [Part 1] | NewlyWeddedWurl.Wordpress.com
Besides preparing for the demolition (like covering the carpet with plastic and helping fetch tools) and doing clean up, this was my contribution to the demo. I did tear off more and made it easy to tear this wall off in two sheets.
And Away We Go with Demolition | Our Bathroom Makeover [Part 1] | NewlyWeddedWurl.Wordpress.com
Yay! Once we got the hang of it, our speed and motivation picked up.
After about three hours, broken up by a two hour trip to Menard’s for more supplies (closest one is 35 minutes away), we had completely torn up the walls and the shower floor. And guess what?

We discovered that there indeed used to be a window in this bathroom.

After the Demo... Surprise Reveal | Our Bathroom Makeover [Part 1] | NewlyWeddedWurl.Wordpress.com

The next day our contractor came and installed the tub. There were some issues with the plumbing that created a delay, but after a full work day, we had a working tub & shower!

Tub and Shower installed! | Our Bathroom Makeover [Part 1] | NewlyWeddedWurl.Wordpress.com

When my love asked me what type of shower I wanted, I said 1) easy to clean, meaning, no built in shelves in the corners, and 2) deeper the better! With my migraines and muscle issues, taking an Epsom salt soak does wonders for making me feel better, and the more water I can have in the tub, the better! We ended up purchasing a 16 inch tub and it is amazing.

The next two days our contractor came back to mud and sand the new drywall. It is starting to look more finished, I guess.

Newly Mudded Shower and Tub | Our Bathroom Makeover [Part 1] | NewlyWeddedWurl.Wordpress.com

This weekend my love and I are going to attempt to tile the bathroom floor (goodbye ugly dated brown tiles!) and I want to paint everything a soft white to compliment the yellow and gray Target towels we got from the wedding.

Target Towels and Bathroom Color Inspiration | Our Bathroom Makeover [Part 1] | NewlyWeddedWurl.Wordpress.com
Pretty towels that will serve as the color inspiration for the bathroom.
Hopefully next week I can post a [Part 2] to our bathroom makeover! In the mean time, I have another little makeover that’s less tedious and more fun to share:

Owl Transformation | Our Bathroom Makeover [Part 1] | NewlyWeddedWurl.Wordpress.com

I have an obsession with owls. Or at least I have a very large collection of ceramics, kitchen accessories, a trivet, a cookie jar, and maybe even a framed picture all of owls. So when my husband found this little owl kitchen scrub holder, he bought it for me. I love it! Though I didn’t love the colors, for $3 I knew I could turn this little guy into something you might find at Pier One or Target.

I started with a coat of regular craft paint; I mean, that’s a whole lot of color to be covering up.

1st Coat of Paint for Owl Transformation | Our Bathroom Makeover [Part 1] | NewlyWeddedWurl.Wordpress.com

The second coat was to help mask that bright red a little more.

Second Coat of Primer for Owl Makeover | Our Bathroom Makeover [Part 1] | NewlyWeddedWurl.Wordpress.com

Finally, I moved him to the garage to do one two three coats of white spray paint I borrowed from my mom. Once he dried completely, I brought him back in.

Finished Owl Transformation | Our Bathroom Makeover [Part 1] | NewlyWeddedWurl.Wordpress.com

I am so happy with the result (sorry for the blurry picture)! I still need to do a clear coat, since he will be used in the kitchen and will likely get a little messy, but for now, I am enjoying my owl makeover.

Annnnnd I liked it so much I decided to do my Rooster I thrifted (see that post here) at the same time!

Kitchen Rooster Before (side shot) | Our Bathroom Makeover [Part 1] | NewlyWeddedWurl.Wordpress.com Kitchen Rooster Before | Our Bathroom Makeover [Part 1] | NewlyWeddedWurl.Wordpress.com First coat of Rooster's primer | Our Bathroom Makeover [Part 1] | NewlyWeddedWurl.Wordpress.com Second Coat of Rooster's primer | Our Bathroom Makeover [Part 1] | NewlyWeddedWurl.Wordpress.com

He and the chicks need one more coat of spray paint, but soon he will find his way to the top of the kitchen cabinets. Yay!

Thanks for reading! I would love to hear about your home renovation projects and any tips you might have!


Current Crush: Target Dollar Spot

[Pssssttttt: this is my 50th post on NewlyWeddedWurl! I am so excited to have reached this little milestone and cannot wait for all that I have in store for my little corner of the web! Thanks for reading!]

“Brown paper packages tied up with string, these are a few of my favorite things…”

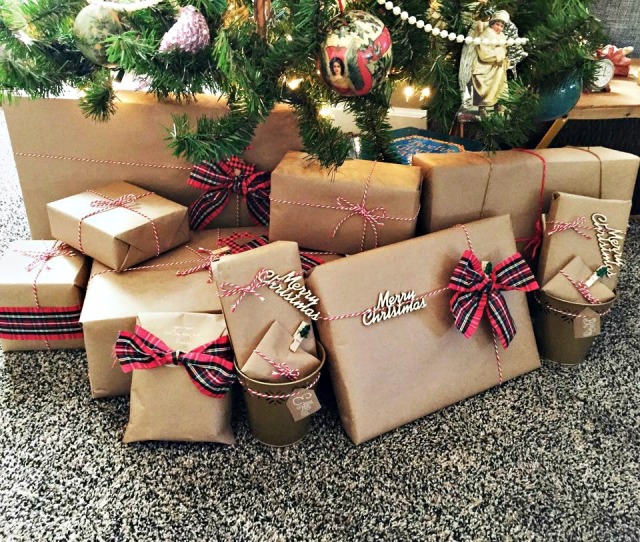
Brown Paper Packages Tied Up with String- Our Presents This Year | Current Crush: Target Dollar Spot | NewlyweddedWurl.Wordpress.com

I don’t know about you all, but I LOVE wrapping Christmas presents. Every year, for as far back as I can remember, my mom made it a holiday tradition for my sister and I to pick out a few rolls of our favorite wrapping paper as well as some bows and name tags that matched. When it came time to open presents, we knew which gifts belonged to who (except for a few surprises thrown in) based on the wrapping. And even though I’m out of the house and married, I still picked out wrapping paper when I was with my mom Thanksgiving week ;).

This year I wanted the presents we gave as a couple to our friends and family to be extra special, you know, put my best foot forward as a homemaker and creative genius… or something like that. And with the age of the internet, abundance of pretty posts on Instagram, and countless how-to posts on Pinterest, getting inspiration isn’t hard at all. I had browsed the web for some ideas but true inspiration struck when I went to my happy place. Target.

Current Crush Zone! Target's Dollar Spot | Current Crush: Target Dollar Spot | NewlyweddedWurl.Wordpress.com
(Excuse the poor quality picture! But that’s me -pre-hair cut/makeover by my sis- about to fill that cart with wonderful goodies)

Have you been to Target in the last two months? The Dollar Spot section is amazing. The first time I was there and saw the Christmas selection I nearly jumped up and down for joy (my husband can confirm). Target’s Dollar Spot is totally my Current Crush.

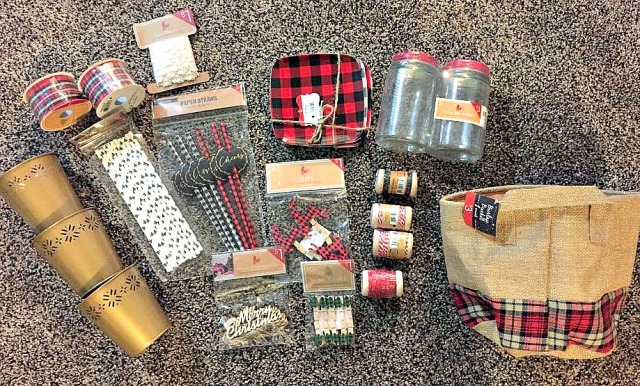
Haul from Target's Dollar Spot! | Current Crush: Target Dollar Spot | NewlyweddedWurl.Wordpress.com

I spent quite a while picking through the goodies like a kid in a candy store. Colored twine, striped string, chalkboard tags, plaid ribbon, wooden word cut outs, metallic gel pens, colored tins, and some ah-mazing Christmas themed clips; I filled my cart first then edited my selection (to my sweet hubby’s relief). [I am only speaking about the wrapping accessories, but goodness gracious! all the Christmas decor is amazing too! I bought a silver cake stand, some plaid plates, some gifts/stocking stuffers, and wanted to buy much more]

Christmas Wrap Necessities Haul from Target's Dollar Spot! | Current Crush: Target Dollar Spot | NewlyweddedWurl.Wordpress.com
I am using the plates and straws in my kitchen’s hot cocoa bar, but everything else counts as Christmas Wrapping Necessities. I actually used the adorable bag to contain all my wrapping tools- keeps things neat, tidy, and cute!

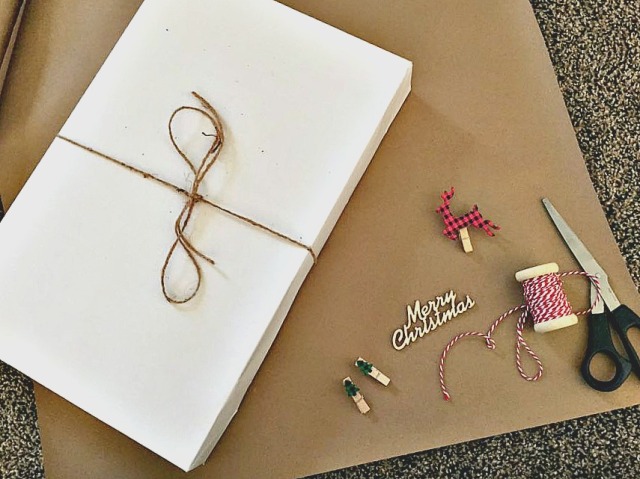
We grabbed a big brown craft paper roll and some scotch tape and ta-da! Project Wrap 2015 was ready to commence.

Wrapping with my Current Crush (Target!) | Current Crush: Target Dollar Spot | NewlyweddedWurl.Wordpress.com

I played around with the first few gifts to see what combination I wanted to use. After wrapping my bestie’s birthday present (with the vintage pink tassel ornament) and doing a few gifts, I had a good idea of the theme I wanted to carry out.

The Start of Christmas Magic Haul from Target's Dollar Spot! | Current Crush: Target Dollar Spot | NewlyweddedWurl.Wordpress.com

Red, white, plaid. Simple, with touches of Christmas pins. I ended up taking off that black bow on the front to maintain this theme. Both the doily-accented presents are going to the same person 😉 so they had the same theme. Once I decided the overall look I wanted to achieve, I started with the stocking stuffer gifts for my hubby.

Stocking Stuffers Need Wrapped Too! Haul from Target's Dollar Spot! | Current Crush: Target Dollar Spot | NewlyweddedWurl.Wordpress.com

Not too bad. I gained more confidence (it always takes me a few presents to find the right method of wrapping so the seams don’t show) and continued with other small presents.

Don't Forget to Spruce up the Small Things Haul from Target's Dollar Spot! | Current Crush: Target Dollar Spot | NewlyweddedWurl.Wordpress.com
Aren’t those little trees darling? and the necklace may be a gift or may be something I bought for myself 😉

For small things like jewelry and candy, I made little envelopes to dress it up and eliminate some of the awkwardness that wrapping small things includes. Add a little Target twine, a “Merry Christmas”, and an adorable tree clip, place the gifts in a Target tin and boom!

It't the little details that make a big impact. Haul from Target's Dollar Spot! | Current Crush: Target Dollar Spot | NewlyweddedWurl.Wordpress.com

I made a few of these little tins and loved the way they turned out!

Next was to try to make a more masculine wrapped gift for my dad (not that he would really care, but hey, I tried). I highlighted simplicity in this one. A few bows and I was finished.

Simple Bows and Twine Top Off this Gift Haul from Target's Dollar Spot! | Current Crush: Target Dollar Spot | NewlyweddedWurl.Wordpress.com

I decided to use a combination of things on one of my love’s gifts. I really love how this one turned out (insert gushing about the adorable little plaid deer- Thank you Target!).

That's a Wrap! One of My Favorite Gifts Haul from Target's Dollar Spot! | Current Crush: Target Dollar Spot | NewlyweddedWurl.Wordpress.com

My wrapping tips are to 1) gather all your supplies, 2) play around with what you have, 3) pick a theme, 4) keep paper seams tucked away on the sides, and 5) have fun!

Though I enjoyed wrapping each gift individually, I LOVED seeing them all together under the tree. The theme I had chosen came across clearly, yet each gift has a unique take- just like the people these gifts are going to!

Brown Paper Packages Tied Up with String- Our Presents This Year | Current Crush: Target Dollar Spot | NewlyweddedWurl.Wordpress.com

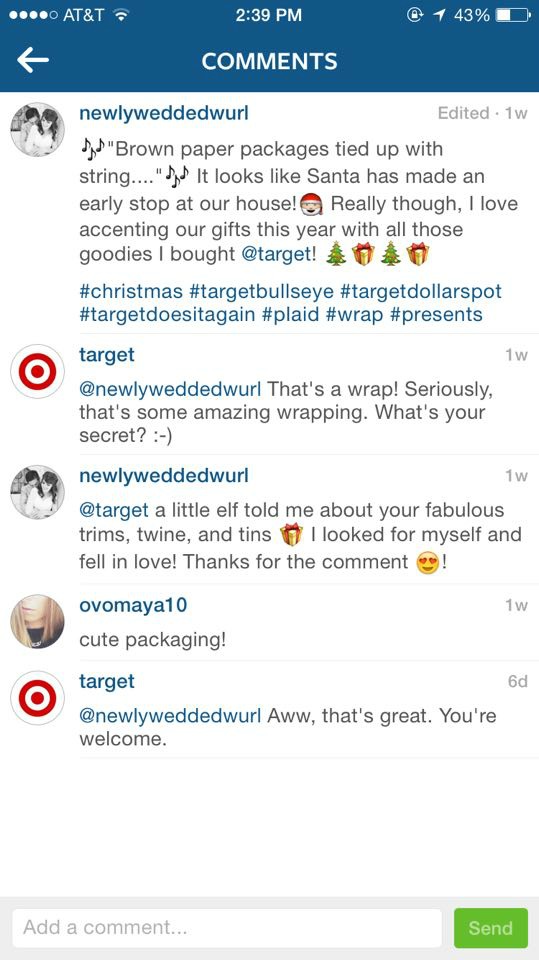
I posted the above picture on my instagram account (newlyweddedwurl – follow me and let me know you saw me on this blog and I’ll follow you!) and got the best surprise ever!

My 5 Seconds of Instagram Fame Haul from Target's Dollar Spot! | Current Crush: Target Dollar Spot | NewlyweddedWurl.Wordpress.com

I used the same Target tags that have been popular (once I fell in love with this month’s dollar spot I searched all of instagram to see other people’s pretties!). AND GUESS WHAT?!?!?!

TARGET COMMENTED!

TWICE!

TARGET COMMENTED!Haul from Target's Dollar Spot! | Current Crush: Target Dollar Spot | NewlyweddedWurl.Wordpress.com

You guys. I was so stoked! Talk about a boost in confidence! I was wowed with Target’s PR, as they took the time to comment and even to reply to my comment. After that happened, I KNEW I needed to do a post, just to share my wrapping tips and to tell you how you really should go to Target to pick up these wrapping accessories. Even if you don’t find anything in the dollar section (which you probably will!), you should check out their Christmas wrap section for inspiration at least :).

Merry {early} Christmas!

*This post was NOT sponsored by Target. I just really love their stuff (who doesn’t?) and want to share with you all!*

How do you tackle Christmas wrapping? Do you have any tips, tricks, or themes you keep with? I would love to hear about it in the comments! And if you are on instagram, I would love to follow you! You can comment your account name here or on my ig and I’ll look you up!

Christmas in Full Swing

Before you judge me, let me say that I will be out of town visiting family for two weeks worth of the coming month; therefore, in order to enjoy my plethora of Christmas decorations, I needed to decorate this week. Or at least that’s how I convinced myself and my hubby to start decking our halls for Christmas this past Monday ;).

Christmas Thrifted Stockings and Stuff | Christmas in Full Swing | NewlyWeddedWurl.Wordpress.com

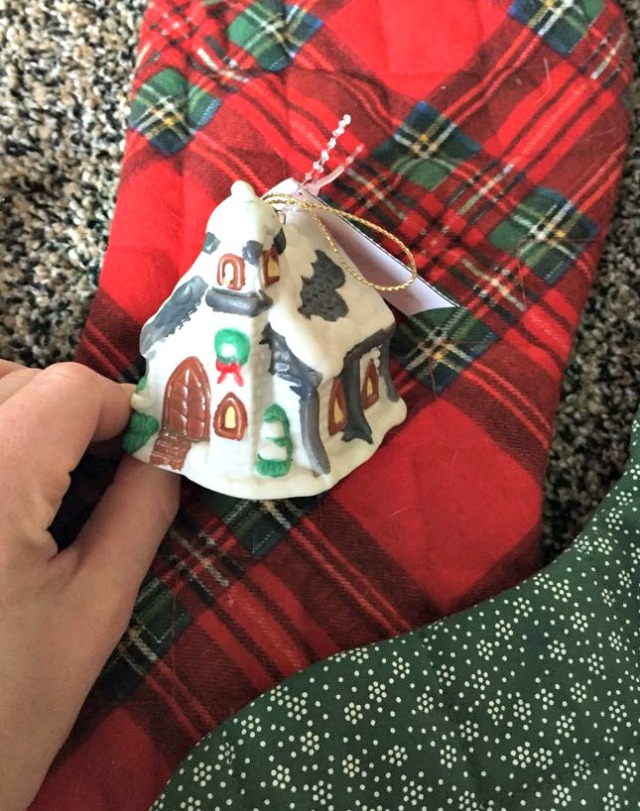
Thrifted Christmas Church Ornament

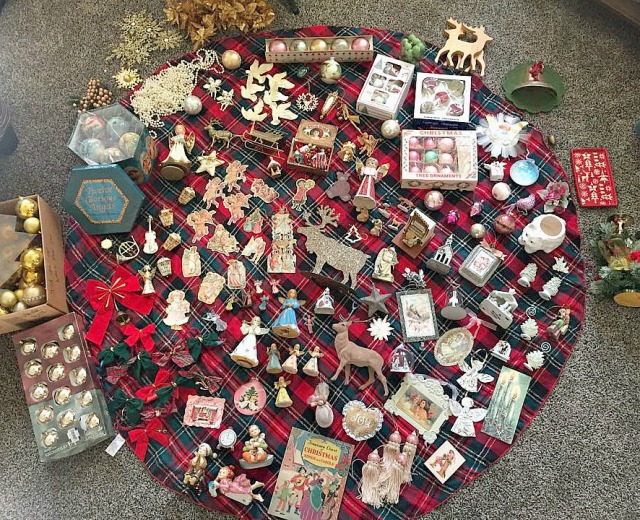
It all started when I went to the thrift store earlier this past week. I found these adorable vintage-vibed stockings and two ornaments for under $2 total. I started thinking about where to hang the stockings, then where to put the tree, and then the wreath, and then curiosity started to wonder just how many Christmas things we had thrifted together over the summer. Before my poor love knew it, I had hauled everything out of the closet and garage to do a quick inventory of what all I had.

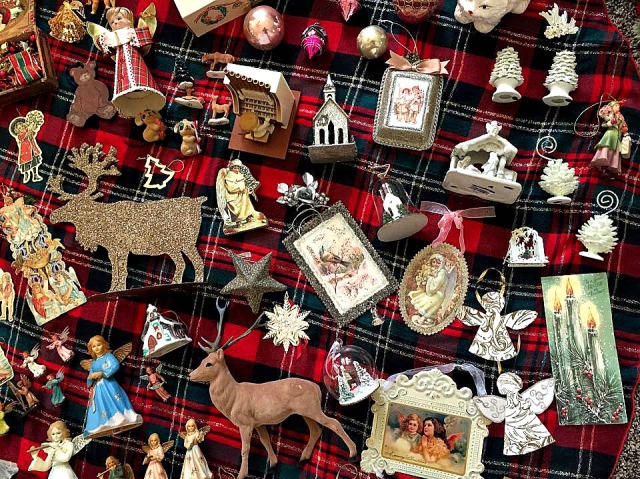
Christmas Decorations To Unpack Everything Layed Out - Vintage Christmas Style | Christmas in Full Swing | NewlyWeddedWurl.Wordpress.com

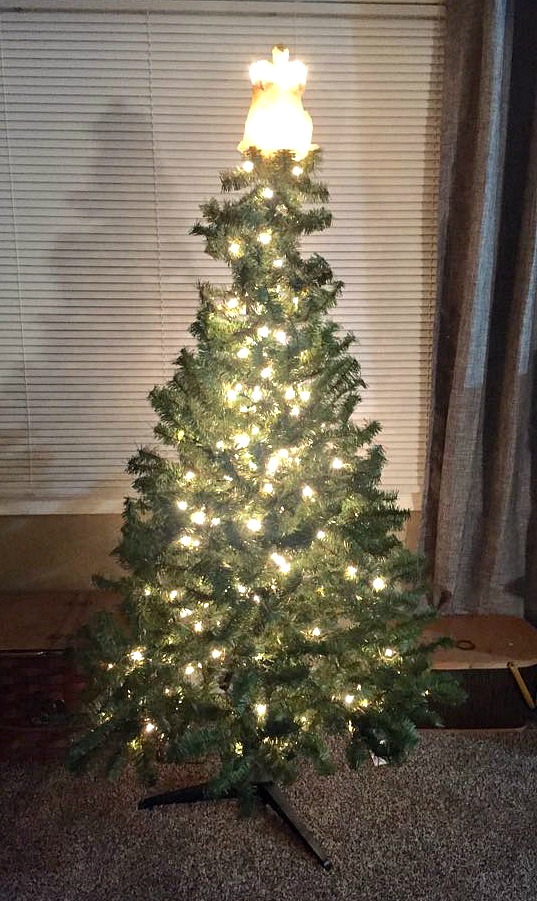
Next thing I knew, the tree was up and I was needing to put lights on it to see if we needed to buy more (which we did, since I am a perfectionist about the lights…about everything really :o).

Lighting the Tree

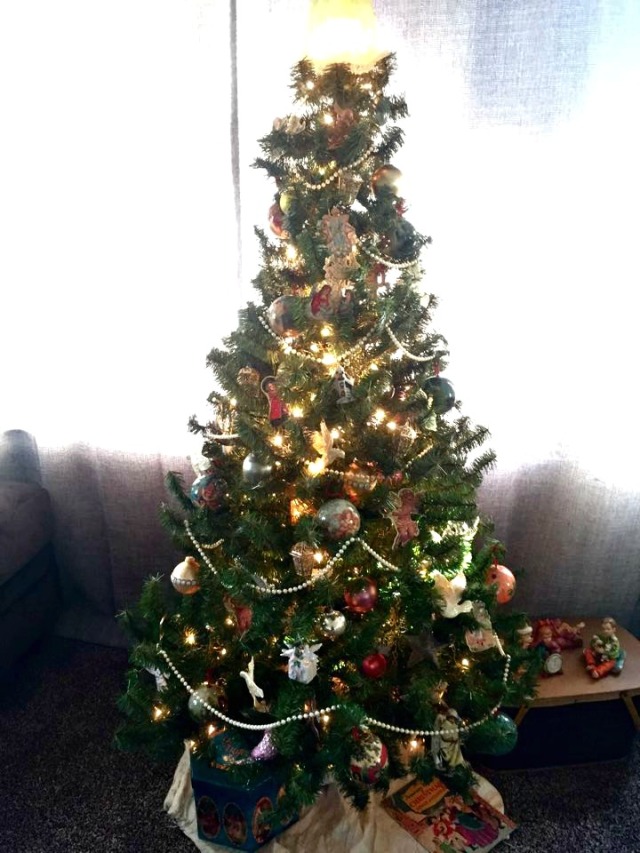
Christmas Tree all Lit Up Everything Layed Out - Vintage Christmas Style | Christmas in Full Swing | NewlyWeddedWurl.Wordpress.com

Bulbs and Basic Ornaments Go First | Christmas in Full Swing | NewlyWeddedWurl.Wordpress.com

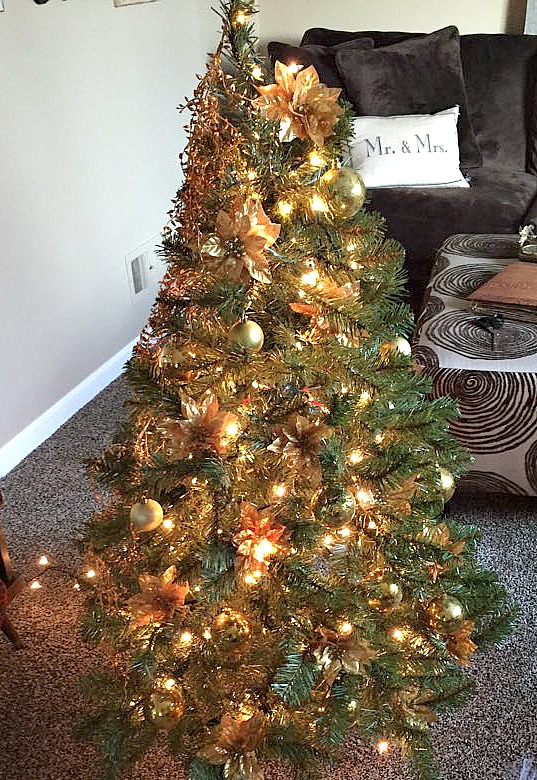
Once the lights were all purchased and on the tree, I started on my gold bulbs. I think it’s important to start near the core of the tree and place some shiny solid colors there to reflect light much better. After I take care of the core, I spread out the balls but keep them tucked under branches to fill holes and add reflection. Doing these steps first adds a lot of dimension to the tree.

Everything Layed Out - Vintage Christmas Style | Christmas in Full Swing | NewlyWeddedWurl.Wordpress.com

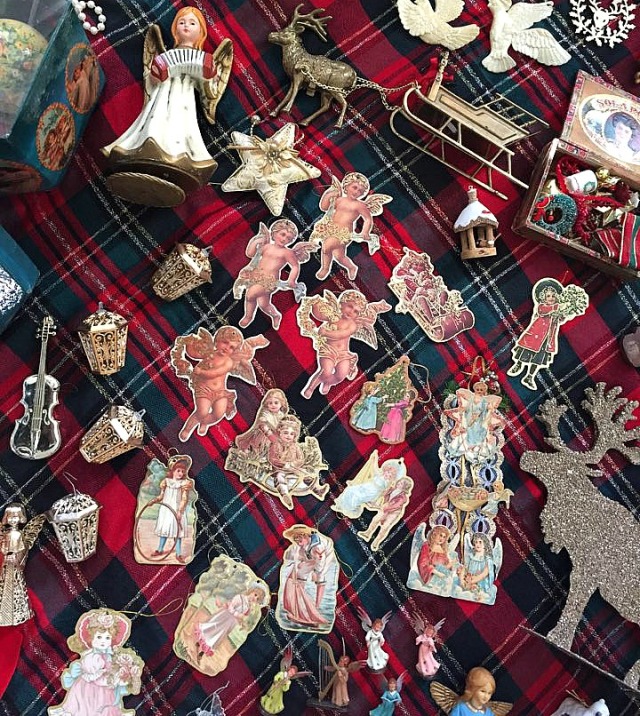
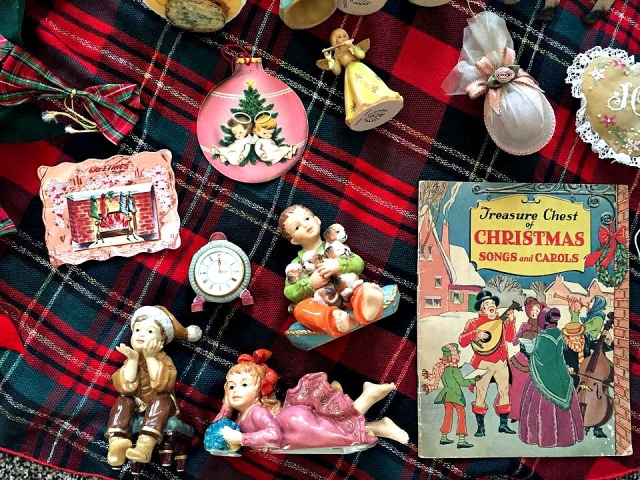
Next came the fun part! I like to lay out all my ornaments before I start, in an attempt to gauge the main theme my tree is going to have. This year I had a nice selection of things that blended well :). Here are some close ups:

Doves and Pearls - Christmas Collection | Christmas in Full Swing | NewlyWeddedWurl.Wordpress.com

Gold Edged Ornaments - Christmas Collection | Christmas in Full Swing | NewlyWeddedWurl.Wordpress.com

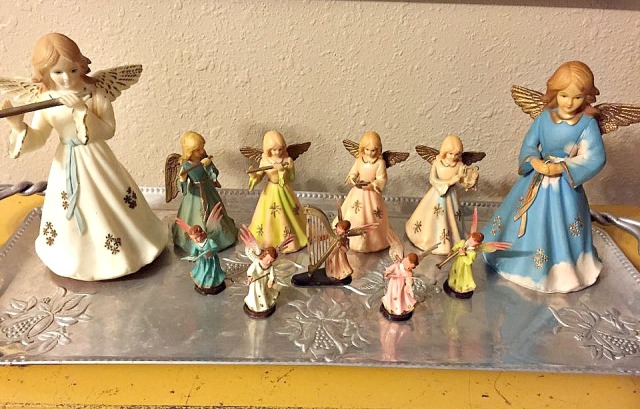
Angel Choir - Christmas Collection Everything Layed Out - Vintage Christmas Style | Christmas in Full Swing | NewlyWeddedWurl.Wordpress.com

Shiney Brights- Christmas Collection

Christmas Collection | Christmas in Full Swing | NewlyWeddedWurl.Wordpress.com

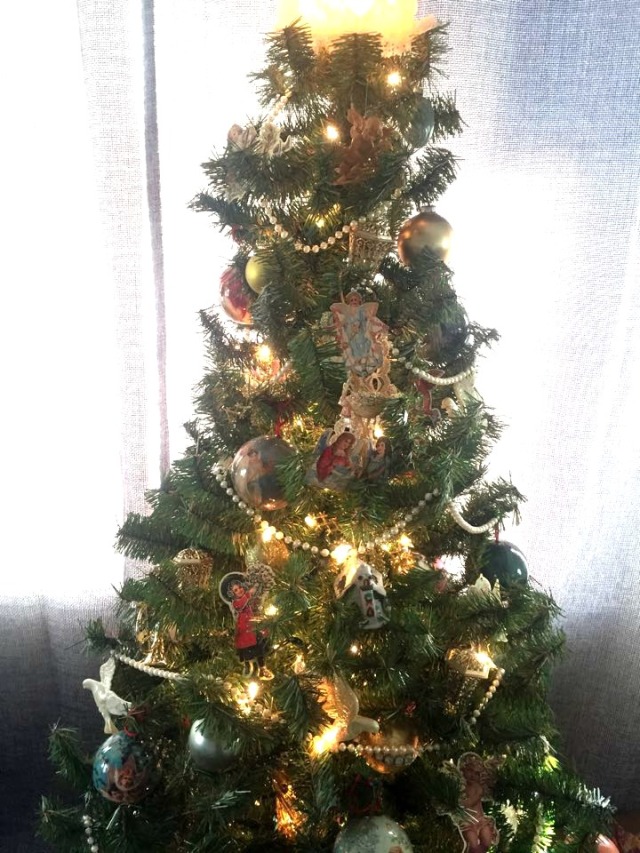
Once I admired my Christmas collection, I added each grouping of ornaments to my tree (first the doves, then the lanterns, the gold edged flat ornaments, then the vintage angel balls, etc.). Once I was content with how it looked, I topped the tree off with a string of pearl beads to pull it all together. I really love how it turned out!

Merry Christmas! Everything Layed Out - Vintage Christmas Style | Christmas in Full Swing | NewlyWeddedWurl.Wordpress.com Our Christmas Tree Everything Layed Out - Vintage Christmas Style | Christmas in Full Swing | NewlyWeddedWurl.Wordpress.com Our Christmas Tree's Top Everything Layed Out - Vintage Christmas Style | Christmas in Full Swing | NewlyWeddedWurl.Wordpress.com(Better pictures to come in following posts :)) .

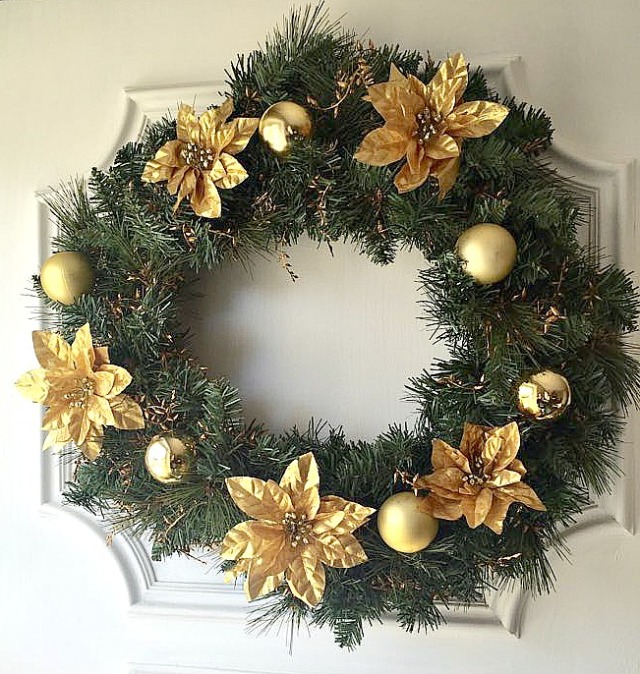
With all of my left over decorations, I had enough to make a wreath for the front door, add a few touches of cheer to the bathroom sink, spruce and sparkle up my shelves in the living room, and STILL had enough to totally makeover my kitchen!

Christmas Wreath

Christmas in the Kitchen

The kitchen tree is traditional red, green, gold, and plaid. I only used two types of vintage balls, some bows, more pearl beads, and a touch of little ornaments. It goes well with the new tablecloth I thrifted on our date night (to be covered in a future post!) and the other Christmas items that deck our kitchen. Most of it I thrifted, but the island centerpiece is made up of Target items from a few years back .

Christmas Kitchen Close Up

Island Christmas

Most of my Christmas littles- including my angel choir collection- still needed a home. My kitchen shelf (which I shared in this post) lacked Christmas cheer- but no longer!

Angel Choir in Kitchen Christmas Everything Layed Out - Vintage Christmas Style | Christmas in Full Swing | NewlyWeddedWurl.Wordpress.com

Christmas Kitchen Shelf Everything Layed Out - Vintage Christmas Style | Christmas in Full Swing | NewlyWeddedWurl.Wordpress.com

I don’t know if the shelf will stay the same or not. I am not completely sold on having it covered with a bunch of little Christmas items, but they make me happy. So we will see :).

Thrifted, Lit Tree for Breezeway Everything Layed Out - Vintage Christmas Style | Christmas in Full Swing | NewlyWeddedWurl.Wordpress.com

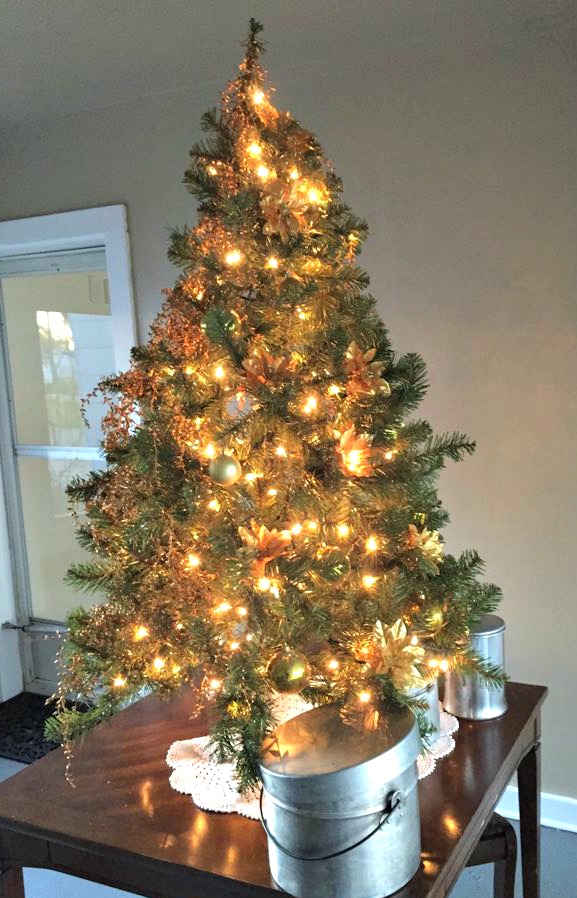
The last thing I did Monday was work on the Christmas tree for our breezeway. I picked up this tree for $6 at our thrift store about a week ago and knew exactly where it would go.

Golden Christmas Tree Everything Layed Out - Vintage Christmas Style | Christmas in Full Swing | NewlyWeddedWurl.Wordpress.com

After covering it in lights, I used the rest of my gold balls, golden picks, and gold sparkly stuff from our wedding to decorate it. Once it made its way to the table in the breezeway, I decided I needed to offset the gold with another color. A quick search in the garage yielded my husband’s silver camping cookware. I  like the combination. Hopefully I will get better pictures soon!

Christmas Silver and Gold Everything Layed Out - Vintage Christmas Style | Christmas in Full Swing | NewlyWeddedWurl.Wordpress.com

So although it is a little early, I am totally loving and enjoying  decorating a whole house this year- let alone the special fact that its is our house, and the first Christmas that me and my husband will get to spend together. My heart is happy, my house is merry, and the season looks bright!

Do you decorate Christmas early? What are some things you do? I would love to read about it in the comments- and feel free to link up a post of your own about Christmas decorating 🙂

DIY Blog Binder Makeover

DIY Blog Binder Makeover | NewlyWeddedWurl.Wordpress.com

I love organization. I showed my whole command center in this post, complete with two calendars, several to-do lists, a big note board to keep track of events, and the weekly planner that I gave out as a freebie (check the post to download it!). But recently, I’ve been struggling to stay organized in my blog planning and printables.

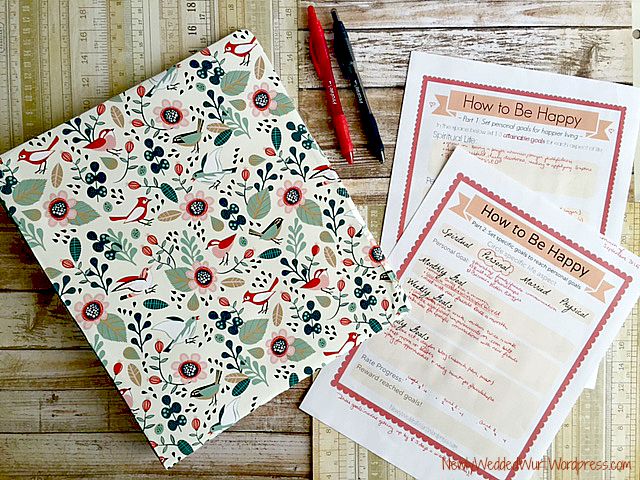
I didn’t want to spend money on a new binder, knowing that I have a few old ones laying around the apartment, but I also know that when I am inspired or in love with how something looks, I am more likely to use it! So this past weekend when my love took me to JoAnn Fabrics and I happened upon this amazing craft paper, I knew exactly what I wanted to use part of it for!

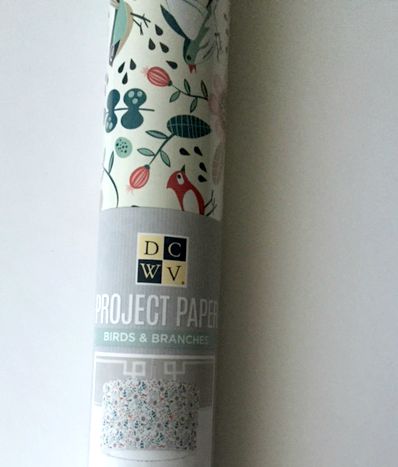
Project Paper from Jo-Ann Fabrics | Must-See Monday: Fun and Finds | NewlyWeddedWurl.Wordpress.com

You can find this “Birds and Branches” print and other adorable patterns by clicking here– and for a short period of time you can order it online for only $3.59! I might be ordering a few more rolls this week! It is a 22″x120″ roll of a heavier weight paper (like copy paper) and was perfect for this DIY project : )

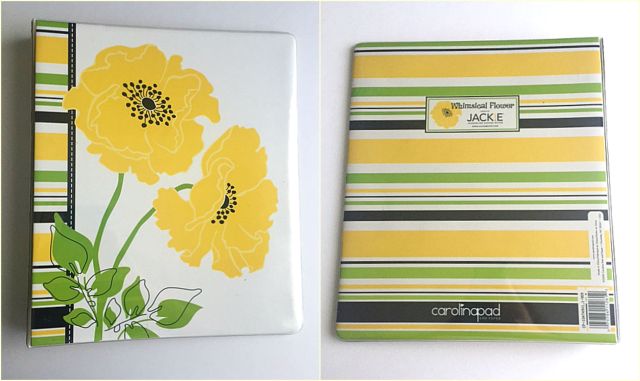
Here is what my old high school binder looked like before: Binder Before - DIY Blog Binder Make Over | NewlyWeddedWurl.Wordpress.com

Not bad for it’s original use of a Home Economics recipe project binder for my dream green and yellow kitchen (which actually ended up being yellow and white, with no green); but not exactly inspiring for my blog. I am all about color coordination and loved that the craft paper I bought matches my blog’s colors and my freebie printables!

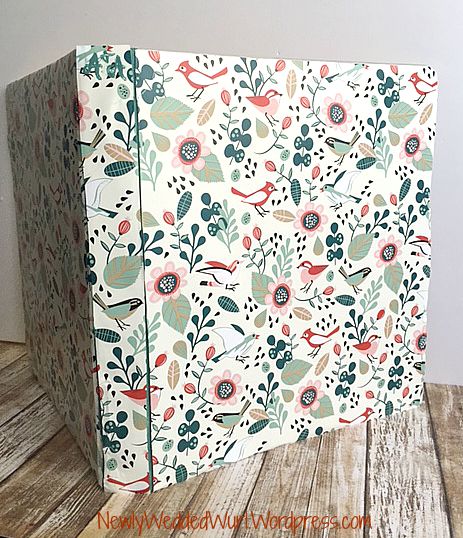
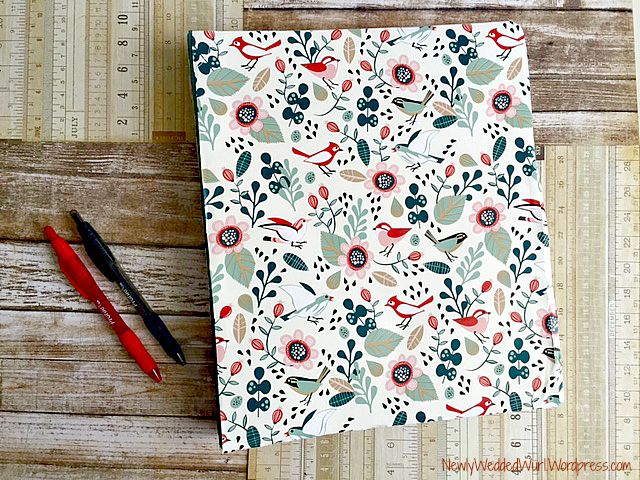
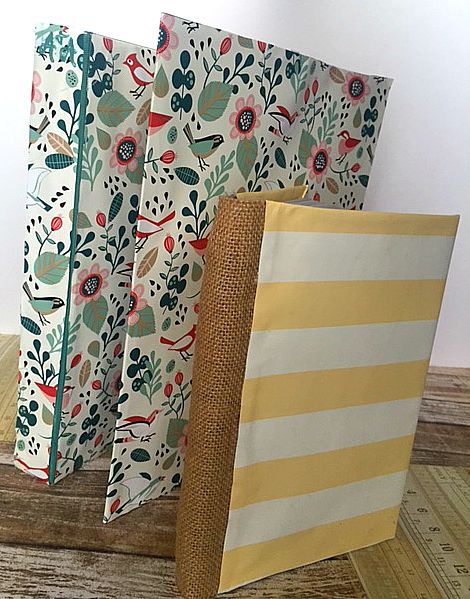
Here is the end result: Finished Blog Binder Make Over | DIY BLog Binder Make Over | Newlyweddedwurl.wordpress.com

I love it so much! And it really wasn’t that hard to do. For this DIY you will need:

  • Old binder, folder, or notebook
  • Cute Craft Paper
  • Good scissors
  • Pen to trace cutting pattern
  • Glue to attach (I used my hot glue gun)
  • Straight edge to smooth out paper (I used a gift card)
  • Matching paint for creases (optional!)

I unrolled the paper wrong-side up and placed my completely open folder on top. Trace edges and mark where to cut between the front, edge, and back. Cut paper and custom cut where needed for binder (I cut the back side to fit, then traced that pattern to cut the front side). Using my hot glue gun, I started at the top and went around the edges, using the straight edge as I went. I did put a few glue dots in the middle to prevent bubbling.

Binder Makeover Edge | DIY Blog Binder Make Over | Newlyweddedwurl.wordpress.com

Once I repeated this process for the front, back and the edge, I realized that the creases stuck out unattractively (they were clear plastic, but just cheapened the look to me). I was fortunate enough to have the perfect teal craft paint in my selection of 10 paints and carefully brushed in the creases. I also added our first initials to the top as a faint detail (my hubby and I shared the same initials before we were married- AW & AW. The friend that set us up thought that was a sign we were perfect for each other 😉 ).

Blog Ready Binder | DIY Blog Binder Make Over | NewlyWeddedWurl.Wordpress.com

Not only am I thrilled with the outcome, but I am super happy it coordinates so well with my past blog papers!

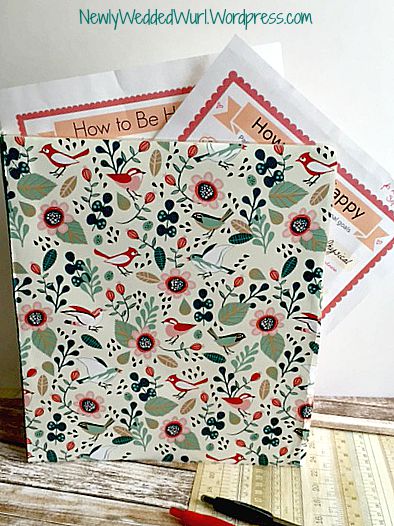
New Blog Binder | DIY Blog Binder Make Over | NewlyWeddedWurl.Wordpress.com Blog-Ready Binder and First Inserts | DIY Blog Binder Make Over | NewlyWeddedWurl.Wordpress.com
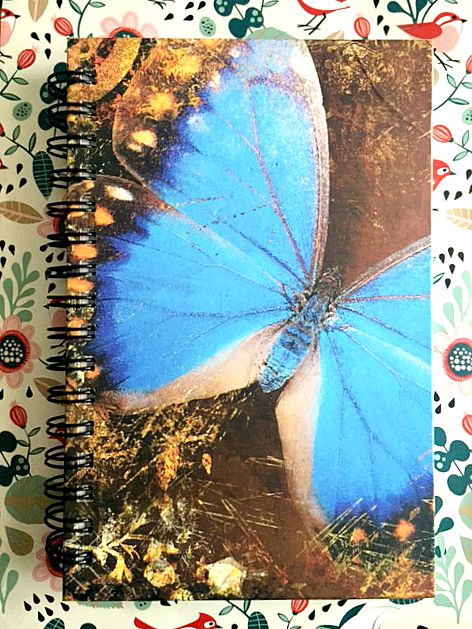
I loved this project so much that I decided to repeat the process on an older folder and my current blog notebook so that everything is pretty, matching, inspiring, and makes me happy : ). There was nothing wrong with notebook I was using before- I actually liked having the butterfly as a reminder of new life found through trials- but alas, it did not match my new binder:

Blogging Notebook Before | DIY Blog Binder Makeover | NewlyWeddedWurl.Wordpress.com

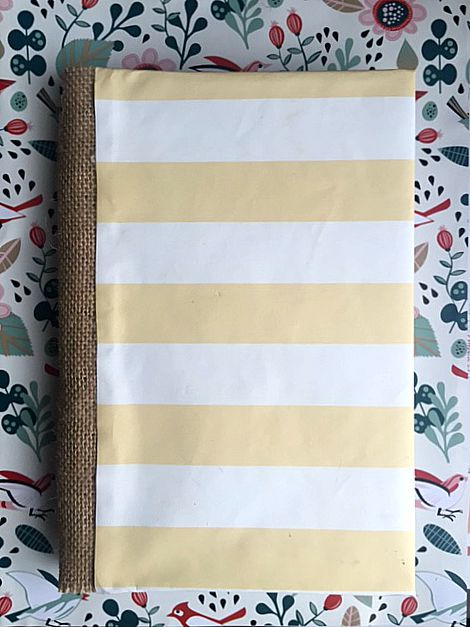
I searched through my craft box and found some scrap burlap- which was the perfect touch to cover up the old binding. I cut a strip large enough to go around the binder with the notebook closed (since that is it’s largest surface point) and tacked it on with my hot glue gun. After that I cut my craft paper to size, with a little extra on three sides:

Notebook Cover Process | DIY Blog Binder Makeover |NewlyWeddedWurl.wordpress.com

I was pretty proud of the finished product for a DIY that was spur of the moment!

Finished Blogging Notebook | DIY Blog Binder Makeover | NewlyWeddedWurl.Wordpress.com

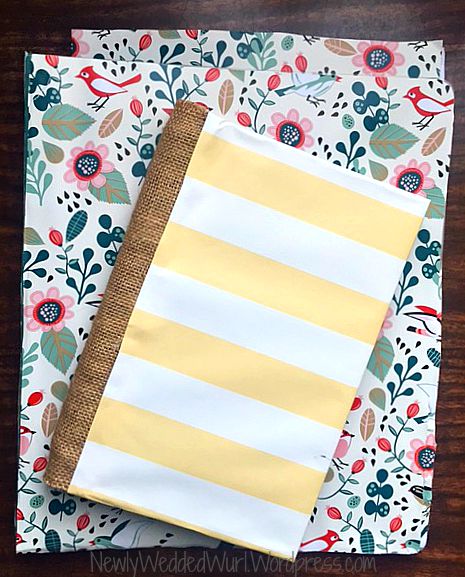
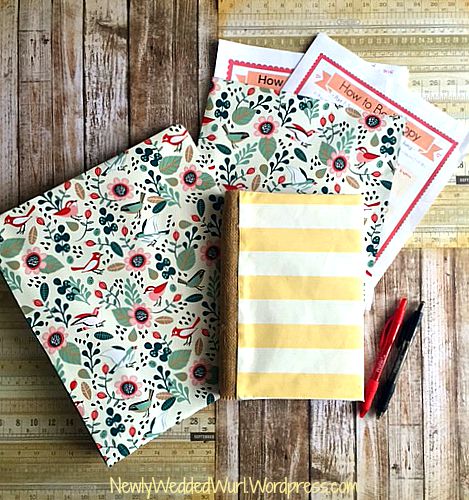
My new stylish stack of supplies: Stylish and Stacked Supplies | DIY Blog Binder Makeover | NewlyWeddedWurl.Wordpress.com

The folder was super easy- I just followed the same procedure I did for the binder, minus the paint.

Better Blogging Supplies | DIY Blog Binder Makeover | NewlyWeddedWurl.Wordpress.com

I think I am going to go over the flat surfaces with clear contact paper to further protect each piece for future use. But for now, I’m happier than a bird with a french fry.

Makeover Blogging Supplies | DIY Blog Binder Makeover |NewlyWeddedWurl.Wordpress.com

That’s today’s simple DIY! I hope it challenged you to look at the potential of current items you have- and maybe be inspired by some pretty craft paper!

Are you more likely to use something if it’s coordinated and pretty (I’m so guilty of that!)? How do you organize your blogging content? Have you given something old new life with a makeover? I would love to hear about it in the comments!

Festive Fall: Pumpkin Cats Craft Tutorial

Pumpkin Cats Craft | Festive Fall: Pumpkin Cats Craft | NewlyWeddedWurl.Wordpress.com

Colder weather, hot apple cider with cinnamon, brisk walks around town, Halloween decor in every store; it’s beginning to feel a lot like fall! And one thing I am excited about this fall (and especially winter!) is the chance to decorate our own little place for each holiday!

I knew I wanted to put something on our little patio/porch/entryway to the apartment but I was undecided on what I wanted until a few weeks ago. This picture came up on my Facebook feed and I feel in love with it!

How To Make a Kitty Pumpkin

I showed it to my cat-loving hubby and he was all for the idea. I wanted my cats to have a little more character and buy a pumpkin that I could reuse every year. After a trip to the thrift store to get a bunch of fall leaves, a trip to Hobby Lobby for the supplies (thanks for taking me there, love!), and two afternoons of crafting, I present to you cuteness in a pumpkin.

Finished Pumpkin Cats Craft | Festive Fall: Pumpkin Cats Craft | NewlyweddedWurl.Wordpress.com

It made a perfect pair with my thrifted crate and the rest of the fall leaves I had purchased. A quick scratch of my pens on scrap paper and the addition of four clothespins made my yellow cart a festive fall decoration.

Festive Fall Front Porch Fun| Festive Fall: Pumpkin Cats Craft | NewlyweddedWurl.Wordpress.com

Want to make a little bundle of cuteness for your front porch too?

You will need:

  • 1 medium sized pumpkin from a craft store
  • Knife to cut pumpkin
  • 5 or so little pumpkins that will fit inside for the cat heads (my love wanted two kittens, so we got three big and two small little pumpkins)
  • 1 piece of black foam for ears
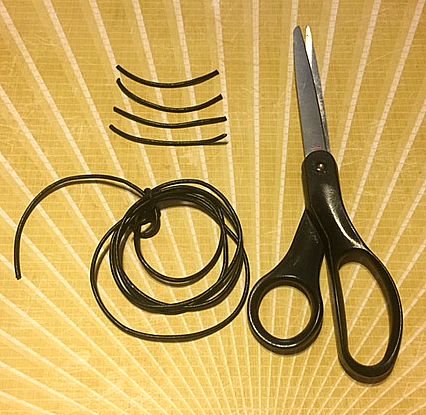
  • 1 roll of thick black cord for whiskers
  • 1 Sharpie marker for drawing eyes and noses (could also paint, but this was easier)
  • Assortment of fall leaves (I bought a small branch from the thrift store for $.75)
  • Floral Styrofoam (to hold the cats in place!)
  • Scissors (for cutting whiskers and ears) and hot glue gun (or super glue)

Fitting the Pumpkin | Festive Fall: Pumpkin Cats Craft | NewlyWeddedWurl.Wordpress.com

My hubby came up with this idea to mark our line around the pumpkin, which worked out very well. He did the toughest job of the craft- cutting the craft pumpkin (we did use a much smaller knife than the one pictured! It worked better that way).

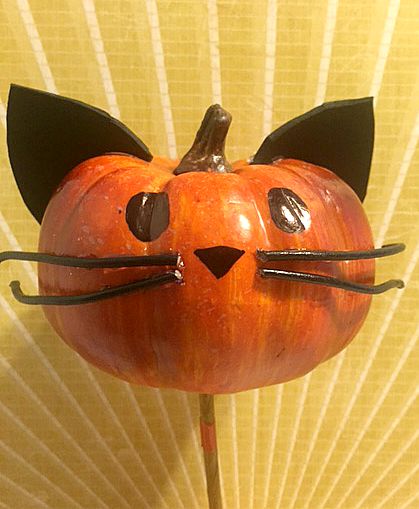
I completed each cat one at a time, knowing I wanted each face to have its own personality and to wait and see what character was missing from the group. I started with the Sharpie face:

Drawing the Cat Face | Festive Fall: Pumpkin Cats Craft | NewlyWeddedWurl.Wordpress.com

Next was cutting whiskers and ears. For the ears I had to cut a general shape from the foam and then adjust once I figured out the placement on the pumpkin. A trial and error process, for sure.

Cutting the Whiskers | Festive Fall: Pumpkin Cats Craft | NewlyWeddedWurl.Wordpress.com

Time for the hot glue gun!

Adding Whiskers | Festive Fall: Pumpkin Cats Craft | Newlyweddedwurl.wordpress.com Finished Cat! | Festive Fall: Pumpkin Cats Craft | NewlyWeddedWurl.Wordpress.com

Once I finished the cats, I played around with their placement. Figuring out Front | Festive Fall: Pumpkin Cats Craft | Newlyweddedwurl.wordpress.com

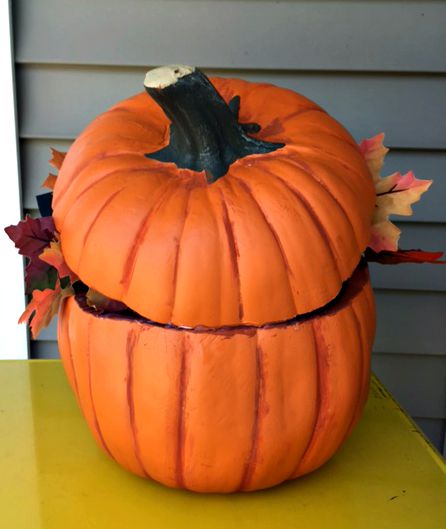
I decided I wanted my pumpkin to look more realistic, so I painted the creases with a darker orange/brown to add accents. I also painted the inside of my lid since you could see it. I added styrofoam to the bottom, added my cats, glued the leaves in a pretty arrangement, then glued the lid on the back, reinforcing it with lots of globs of hot glue (I do want this to last a few falls, after all!).

Finished Product Back View | Festive Fall: Pumpkin Cats Craft | Newlyweddedwurl.wordpress.comFinished Pumpkin Cats Craft | Festive Fall: Pumpkin Cats Craft | NewlyweddedWurl.Wordpress.com

And there you have it! My happy little festive fall craft that combines my love for fall and my crazy love for cats.

What do you like best about fall? Do you like to decorate for seasons too? I would love to hear your thoughts in the comments!